Captured on an iPad simulator using a staging organiser account on 11 September 2026, app version 2.2.1. Riverside League and the conventional division, pub and team names shown are fictional. This walkthrough is the team Division League path. Standard League, remote online player leagues and organisation-tablet scoring are not certified here.
01 · Start · Leagues
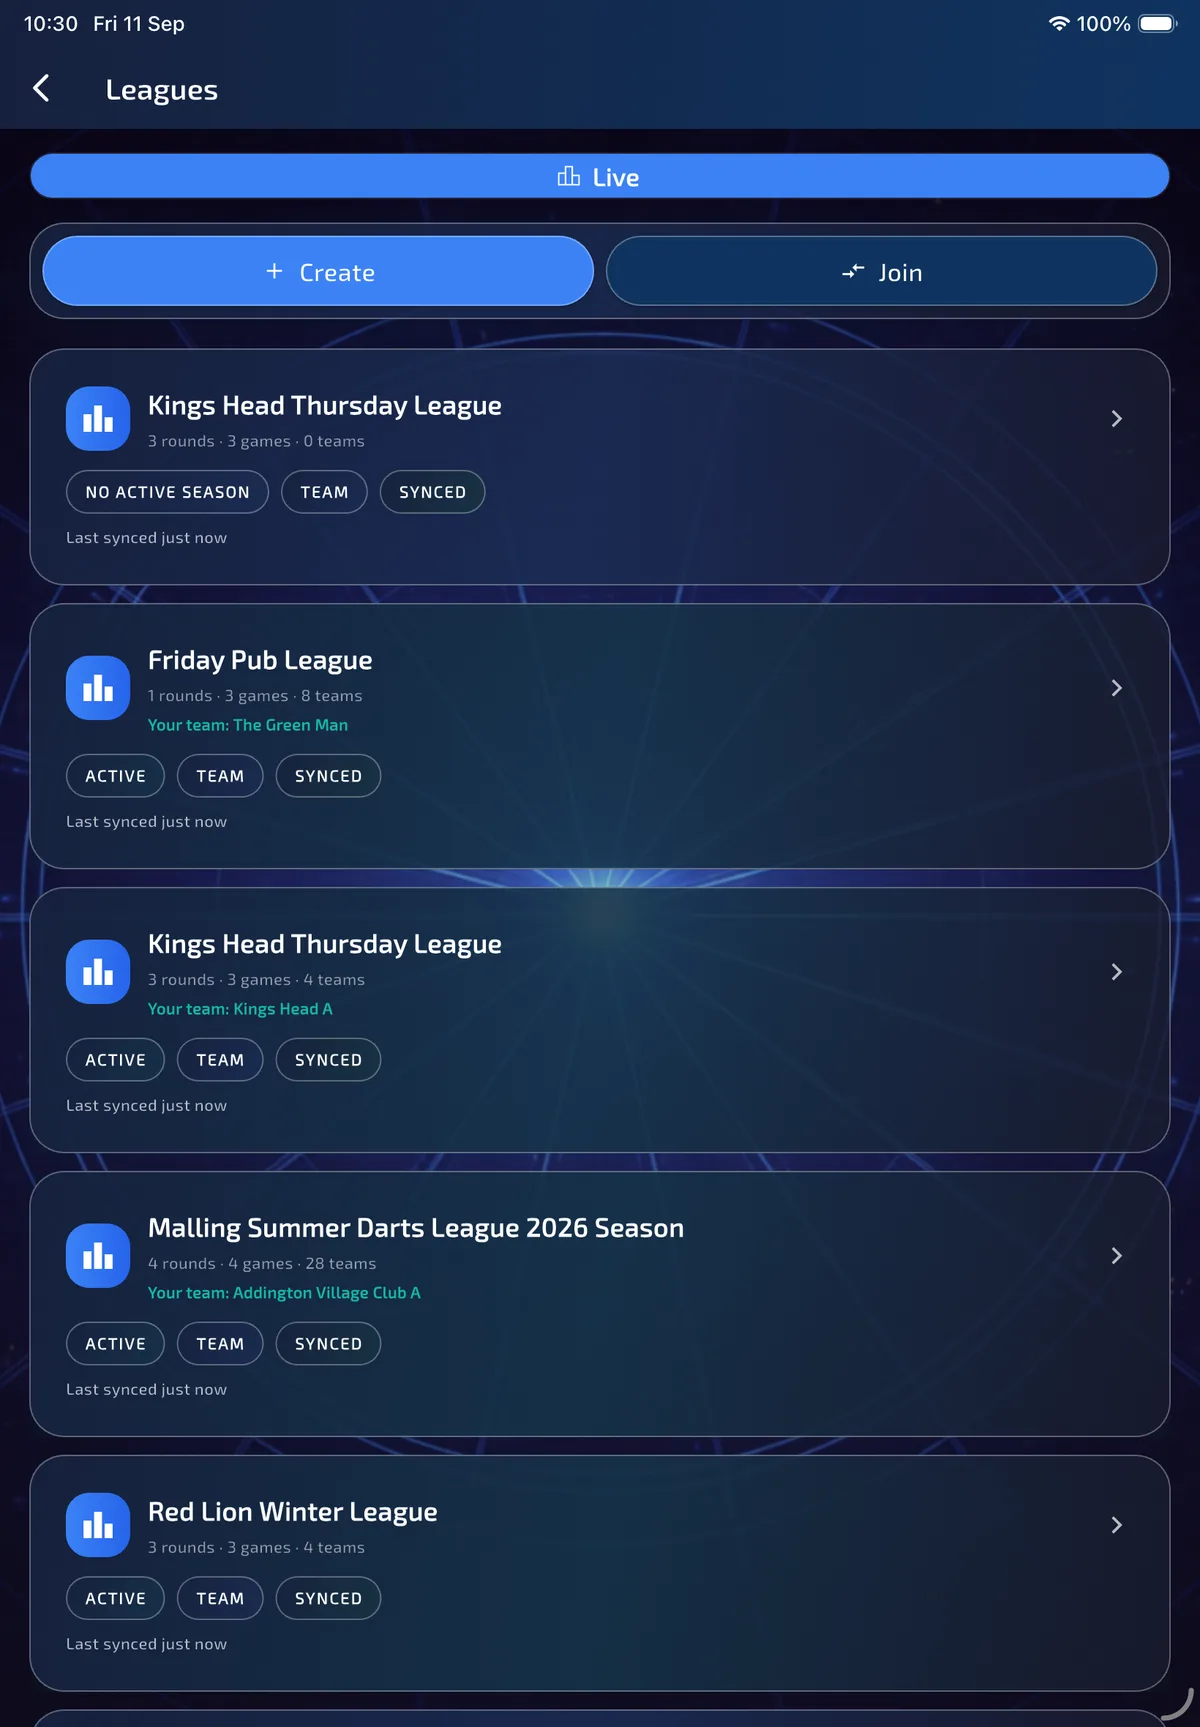
Open Leagues and stay on Live
ResultYou reach the active league list and its Create action.
Division setup starts from the normal Leagues screen, not from a hidden staging shortcut. Open Home → Leagues and stay on Live. The compact Create / Join bar is at the top of the list.
- Open Home → Leagues.
- Stay on Live so you are creating an active competition, not browsing archive.
- Tap Create.
02 · Start · Setup type
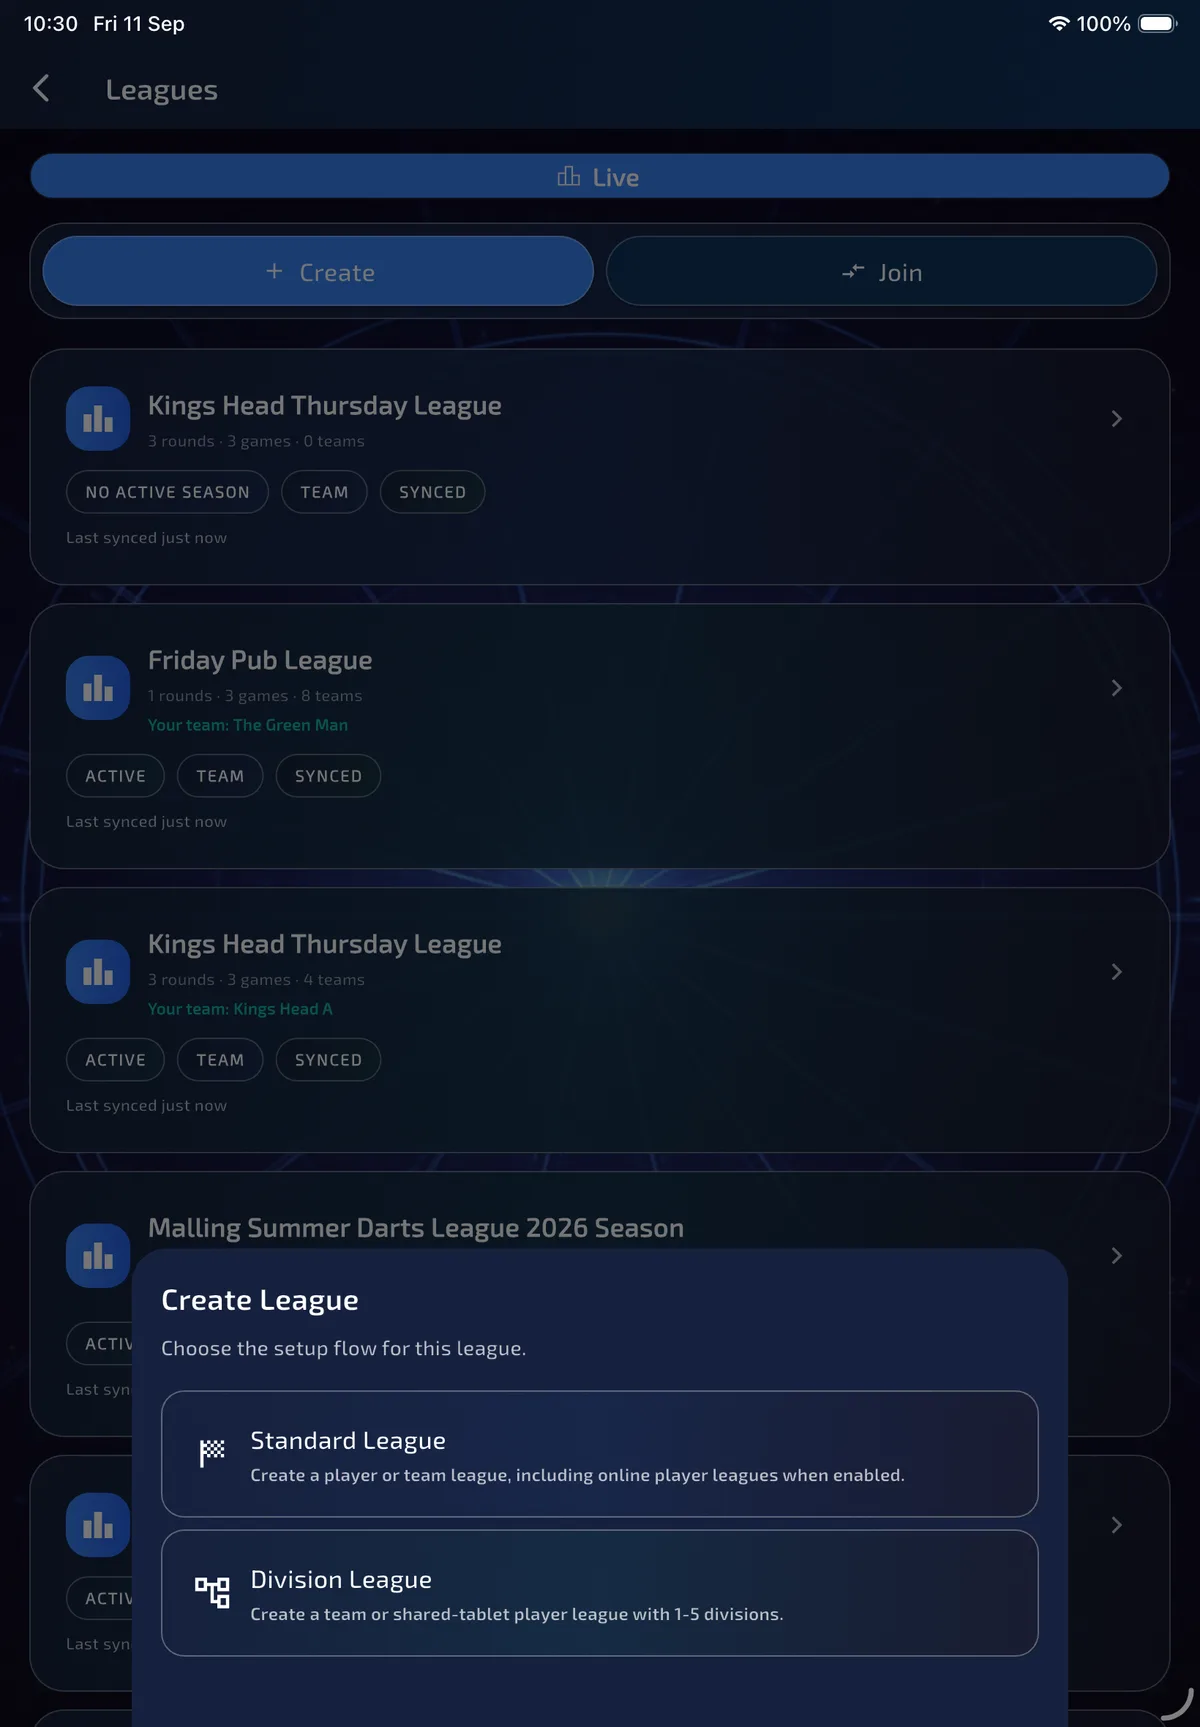
Choose Division League
ResultYou enter the five-step division wizard rather than the single-table flow.
Create first asks which setup flow to use. Standard League is the ordinary player or team league, including online player leagues when that feature is enabled. Division League opens the five-step wizard for a team league or a local shared-tablet player league with 1–5 divisions.
- Read both options before continuing.
- Tap Division League for promotion/relegation structure, per-division fixtures and inherited or custom match formats.
- Use Standard League instead when you need a single table or remote online player-league scoring. Remote online play is not available inside a division league.
03 · Step 1 of 5 · League
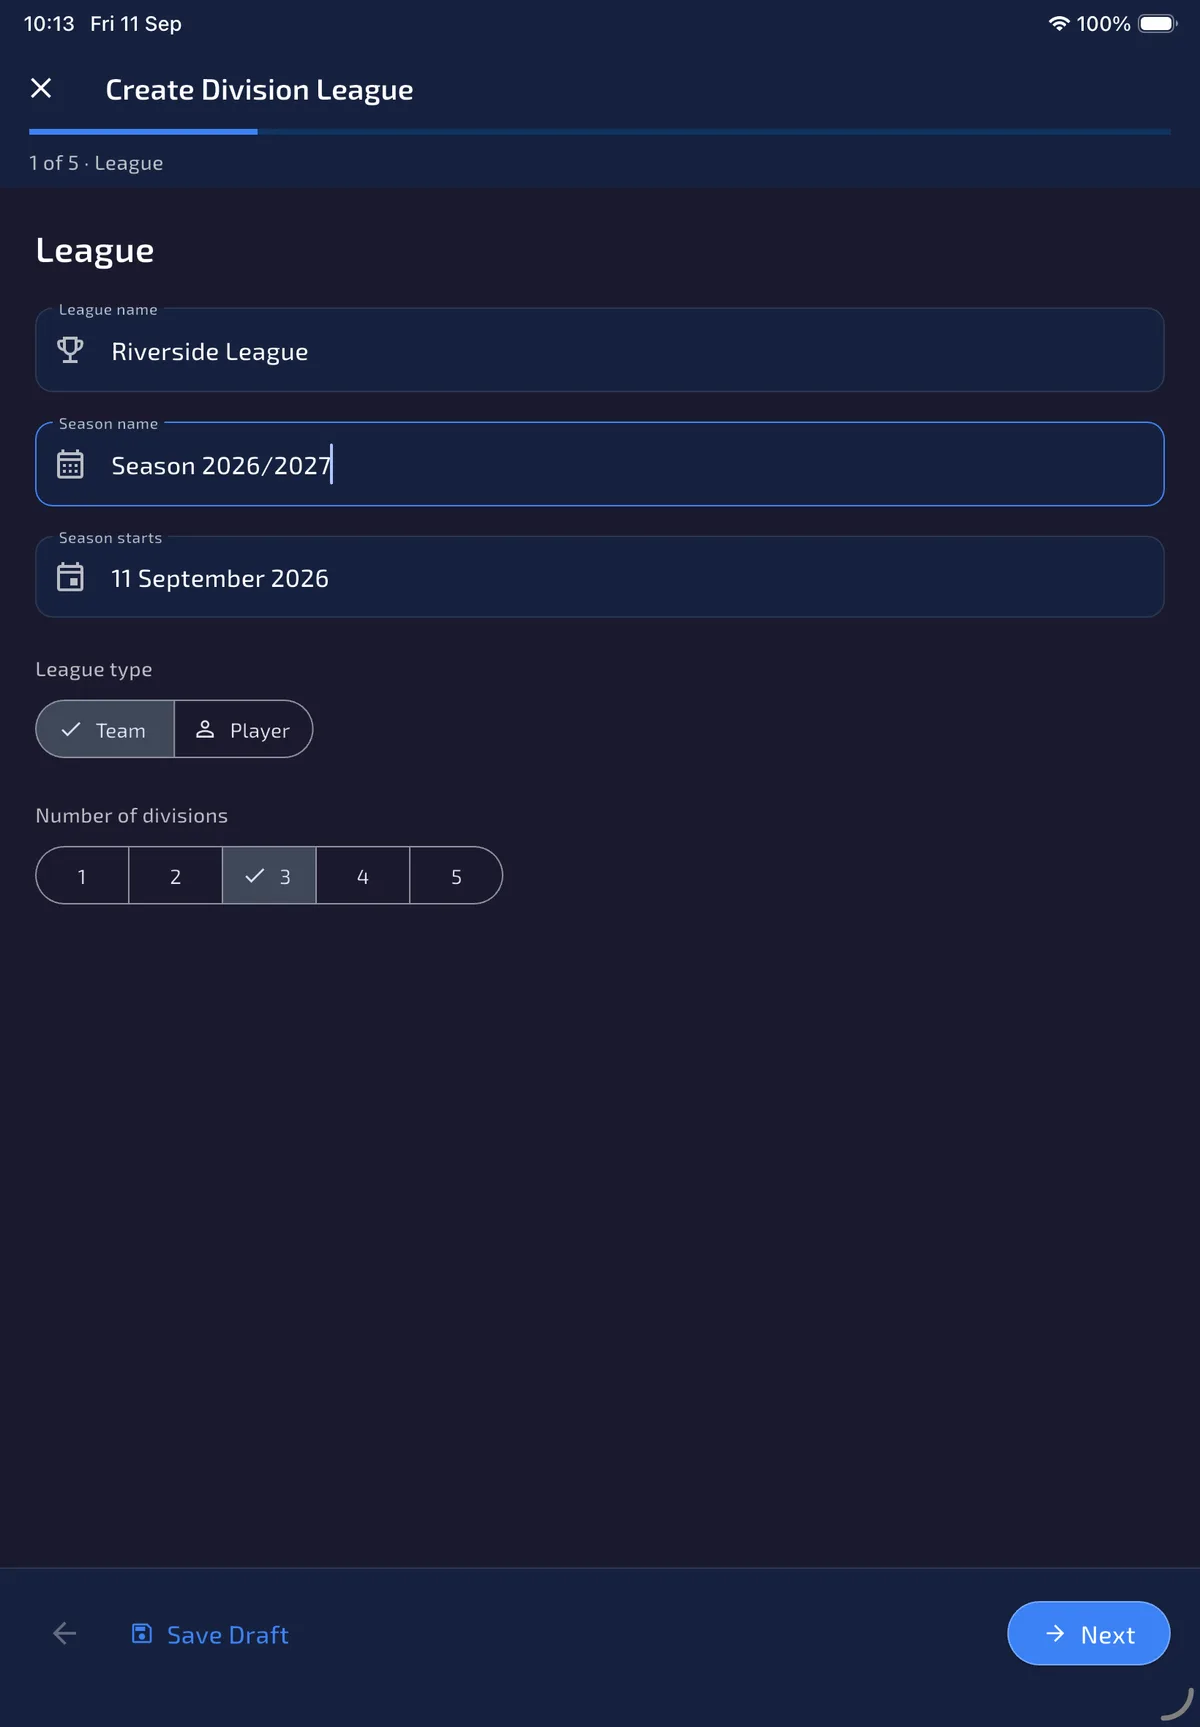
Name the league, season, type and division count
ResultThe wizard knows what you are running and how many levels it needs.
Step 1 of 5 is League. Enter the competition name, season name and start date, then choose Team or Player and how many divisions to create. Team is the usual club/league structure with venues. Player division leagues use local shared-tablet scoring only.
- Enter a unique league name. Display names use title case.
- Check the season name and start date.
- Leave Team selected for a club with home venues, or choose Player for a shared-tablet player ladder.
- Tap 1–5 under Number of divisions. This walkthrough uses three levels with conventional division names.
- Tap Next. Use Save Draft at any time; the draft restores on this device if you leave.
04 · Step 2 of 5 · Divisions
Name each level and set movement places
ResultEvery level has its correct position, name and intended movement zone.
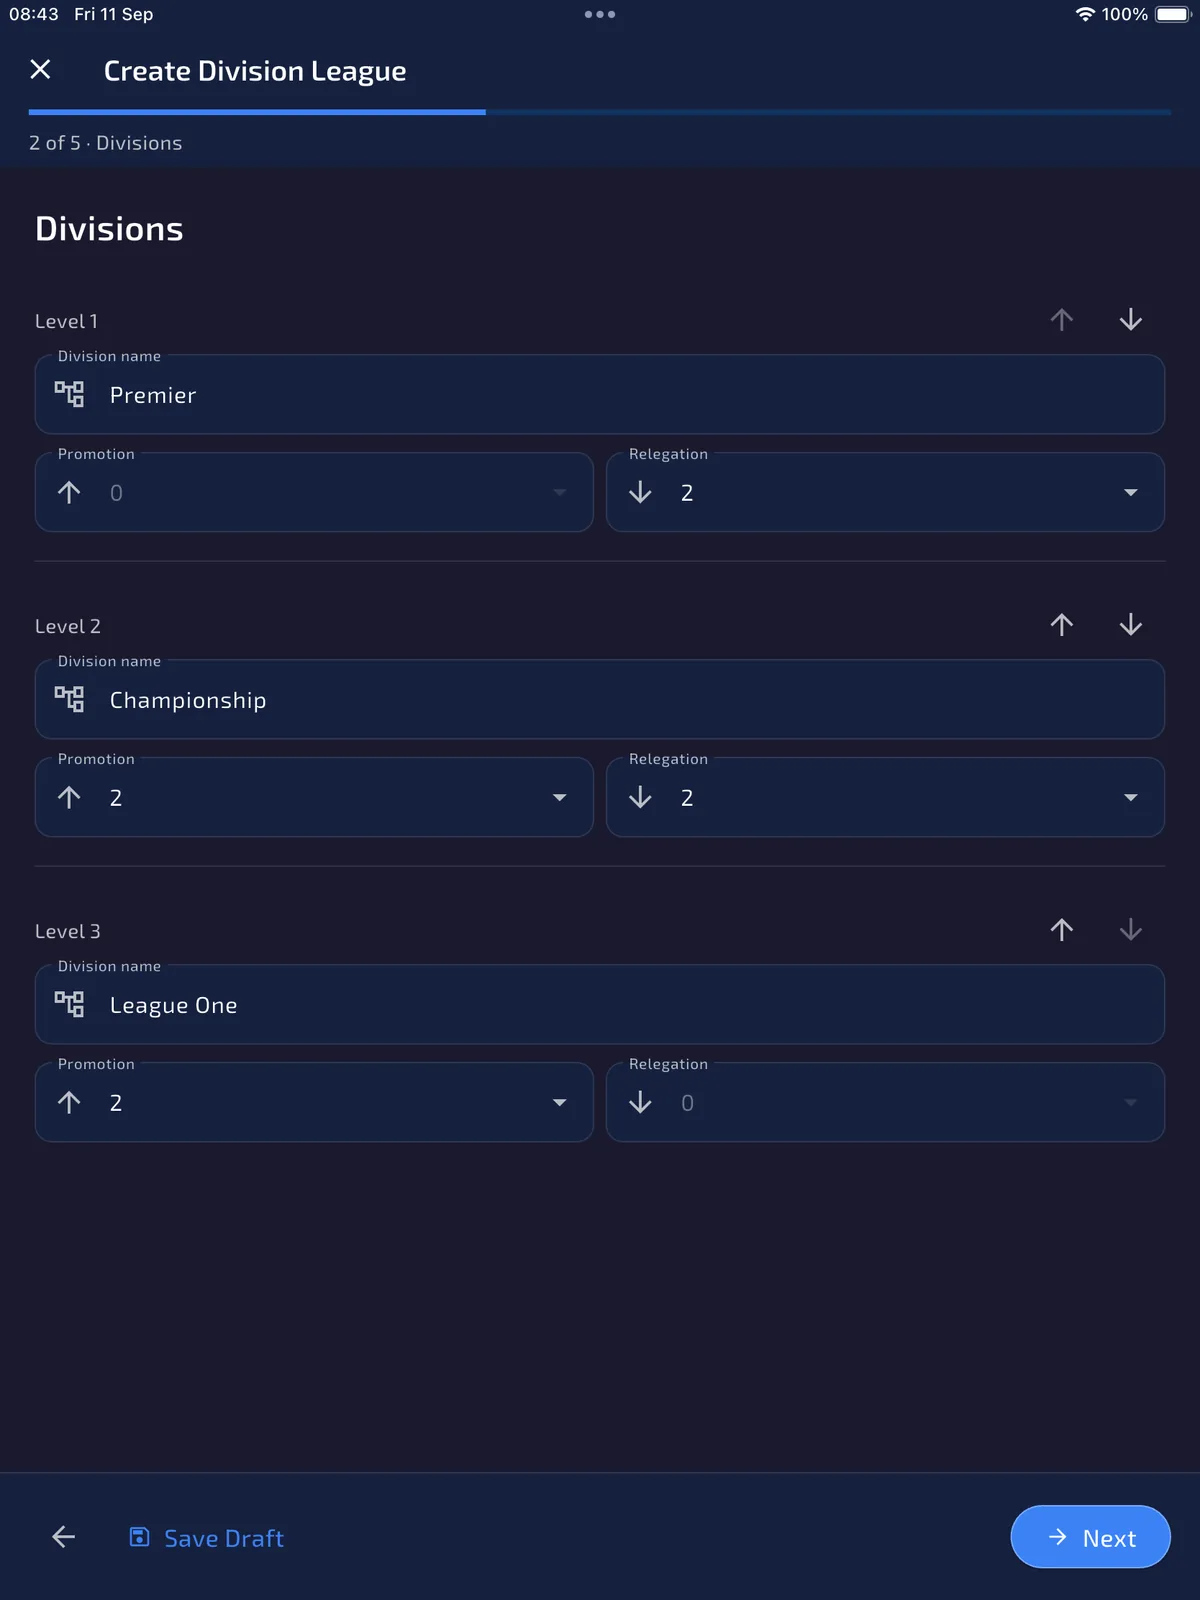
Step 2 of 5 lists every division as a Level. Level 1 is the top division. Use the arrows to reorder. Each level has a name, a Promotion count and a Relegation count.
The top division cannot promote and the bottom division cannot relegate. Those controls stay at 0. Adjacent divisions should use matching counts: if Premier relegates 2, Championship should promote 2.
- Rename each level. In this screen: Premier, Championship and League One.
- Leave Premier promotion at 0.
- Set Premier relegation, Championship promotion and relegation, and League One promotion so neighbouring numbers match.
- Leave the bottom division’s relegation at 0.
05 · Step 2 of 5 · Divisions
Pick promotion and relegation from 0 to 8
ResultThe table can mark the correct promotion and relegation places.
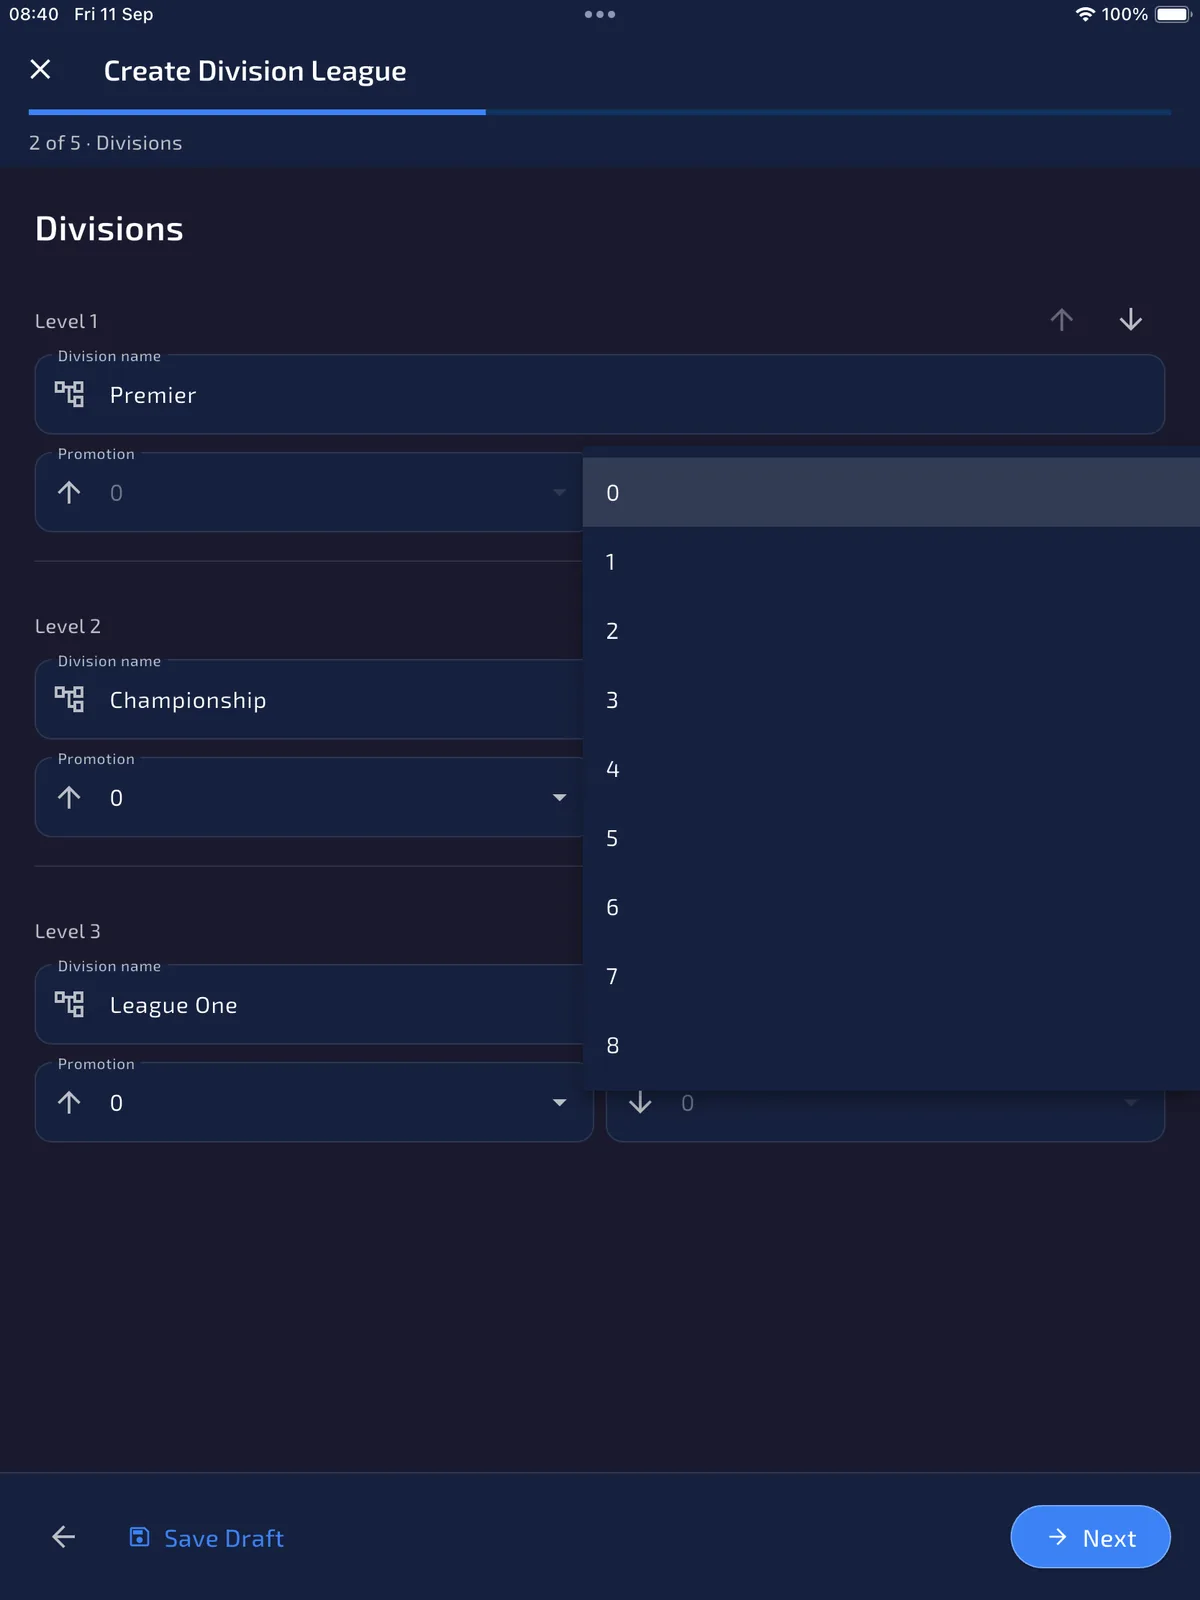
Each movement control is a dropdown from 0 to 8 places. Open Relegation or Promotion on the division you are editing, then choose the number of places that should move at the end of the season.
Saving these numbers does not move teams by itself. After the league exists, owners and delegated admins can still change them in League Details → Manage → Promotion & Relegation. The table later marks P and R rows; it does not auto-relocate clubs.
06 · Step 2 of 5 · Divisions
Fix mismatched adjacent movement
ResultPromotion into each division matches relegation from the level above.
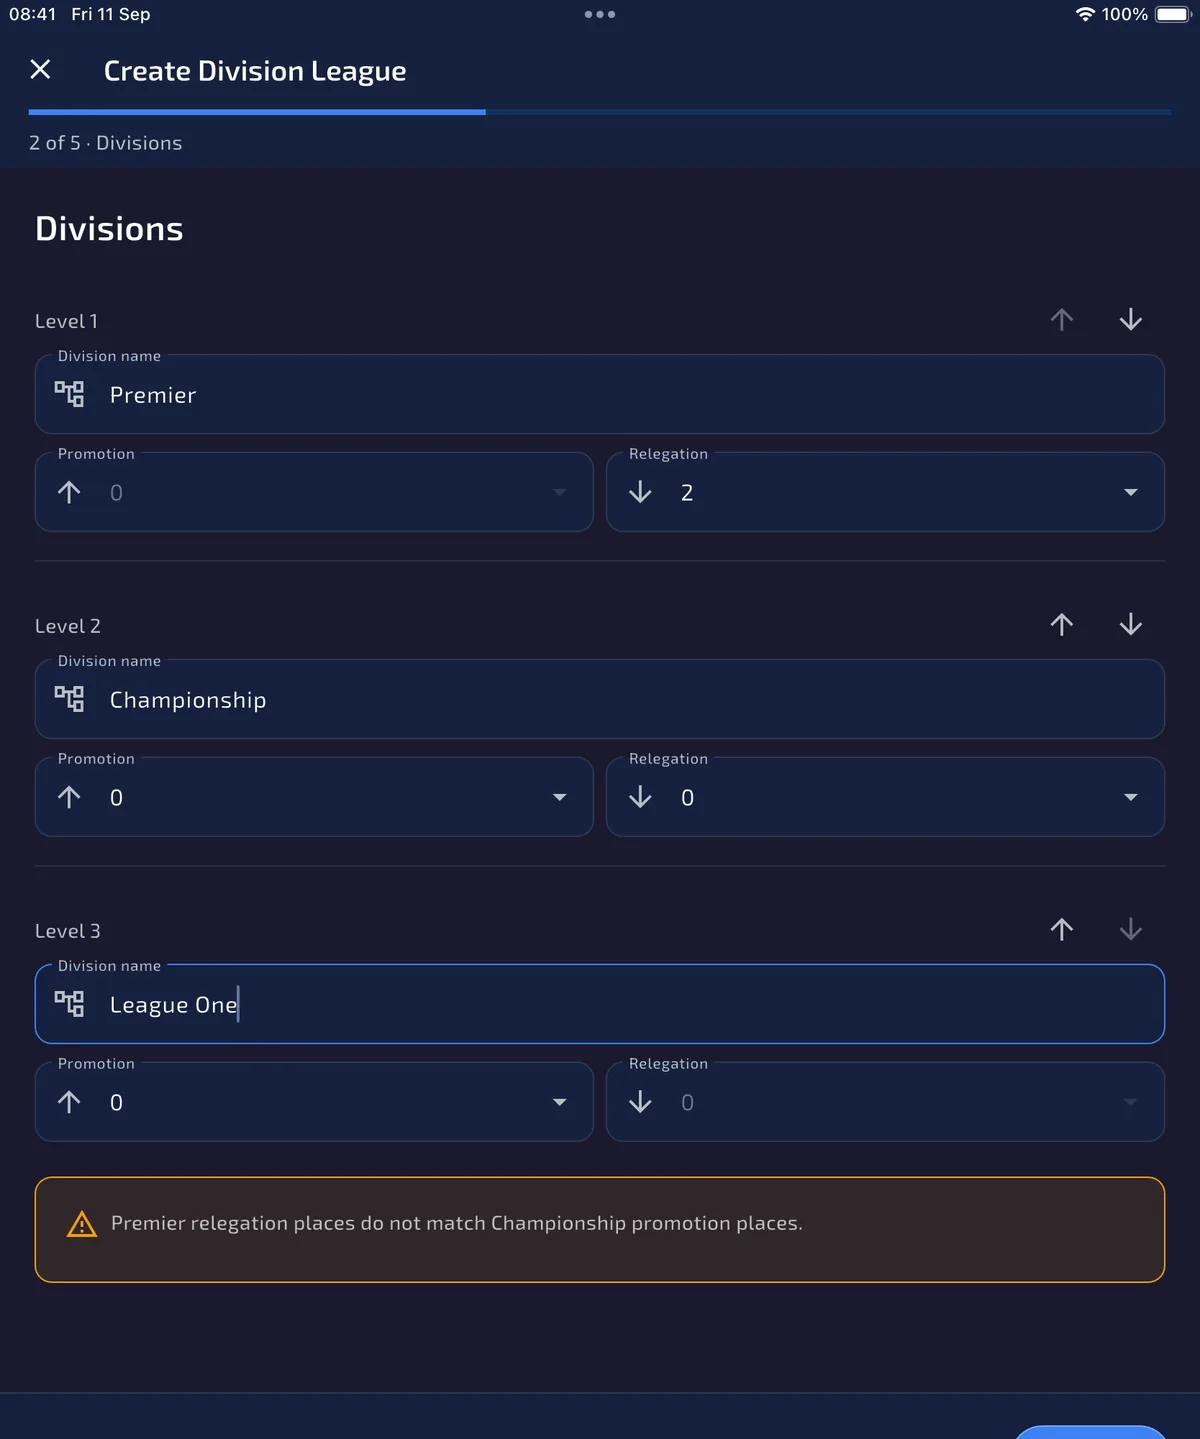
If neighbouring counts disagree, the wizard shows a warning such as Premier relegation places do not match Championship promotion places. You can still continue and save a draft, but you should correct the numbers so the season’s promotion and relegation zones line up.
- Read the warning and identify the two neighbouring divisions.
- Change either the higher division’s relegation or the lower division’s promotion until the numbers match.
- Repeat for every adjacent pair. The warning disappears when the chain is consistent.
07 · Step 3 of 5 · Participants
Add venues and teams
ResultEach division has its assigned teams and usable venues, ready for roster checks.
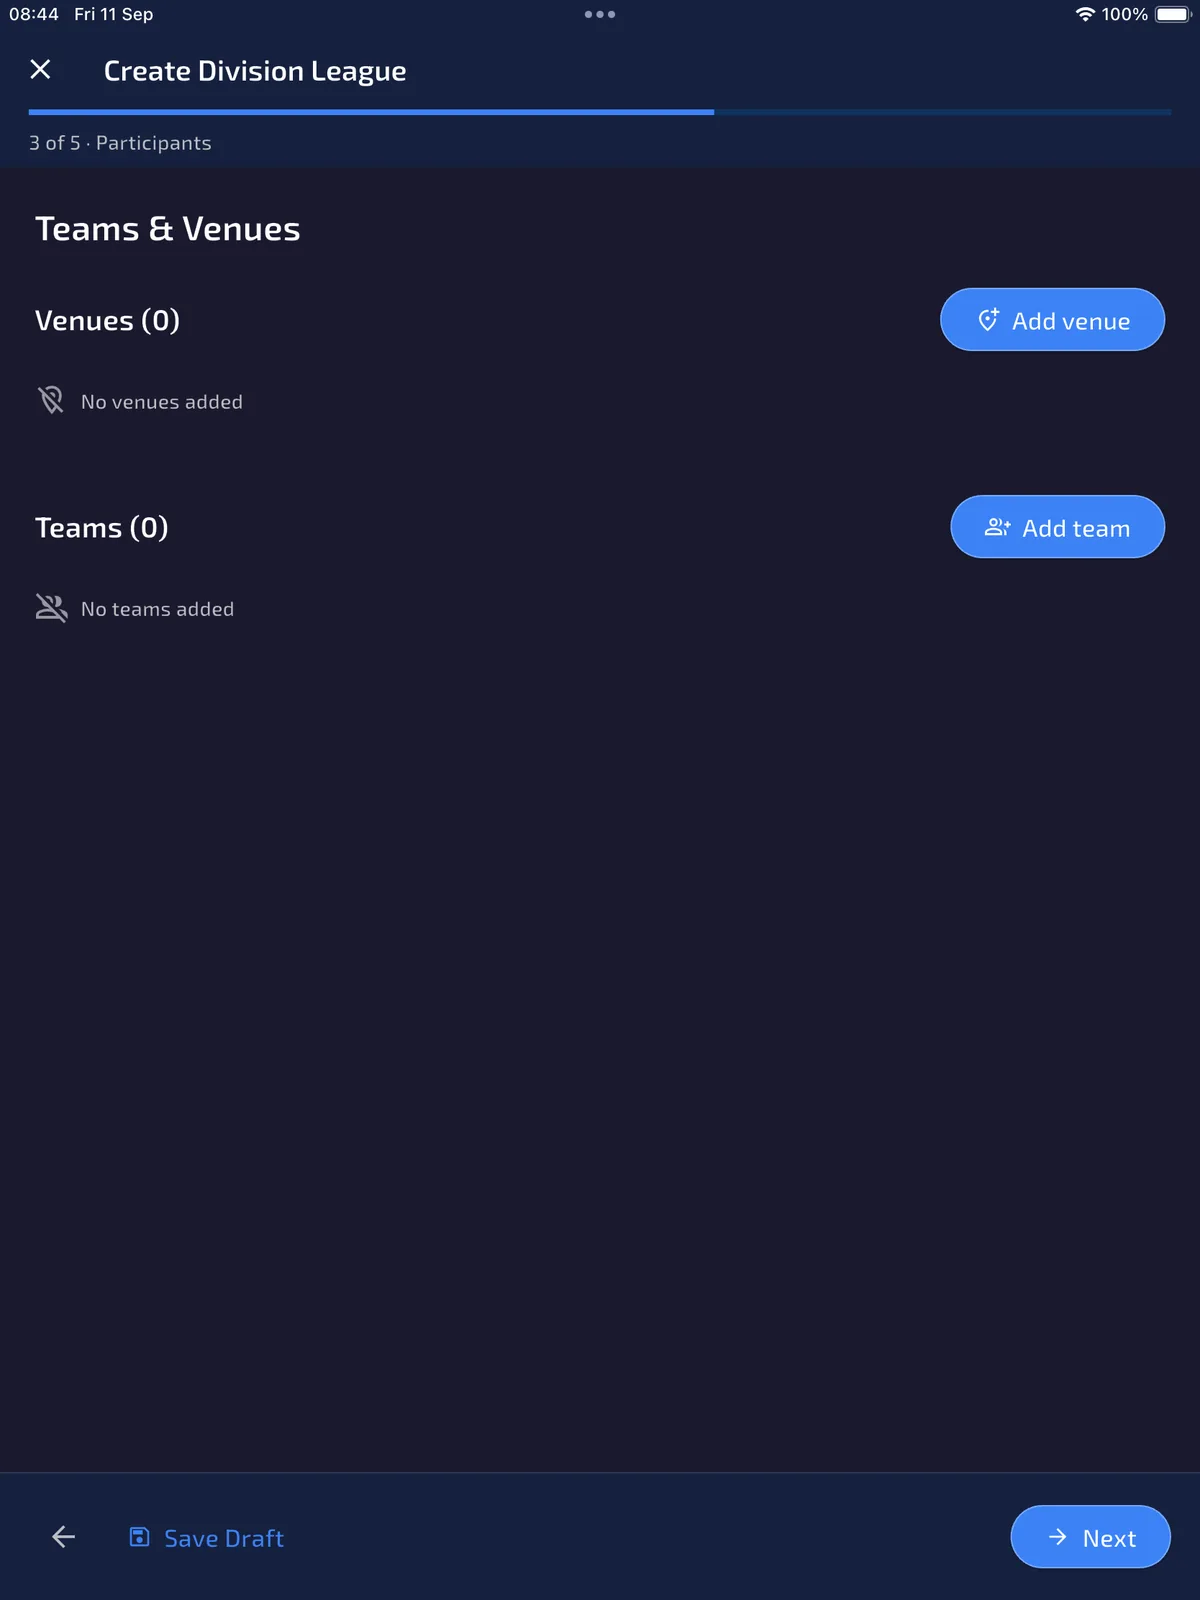
Step 3 of 5 is Participants. Team leagues show Venues and Teams. Player leagues show Players and skip venues. Unassigned participants and divisions with fewer than two participants can stay in a draft, but they cannot produce fixtures.
- Tap Add venue. Mark a league default venue if you have one; fixture generation uses a team’s home venue first, then this default.
- Tap Add team. Create a new name or copy an existing team/roster, then assign that team to one division and optionally a home venue.
- Place at least two teams in every division that should generate a round robin. Teams never play across divisions.
08 · Step 3 of 5 · Participants
Fill venue name, address and postcode
ResultHome fixtures can carry a reusable venue and address.
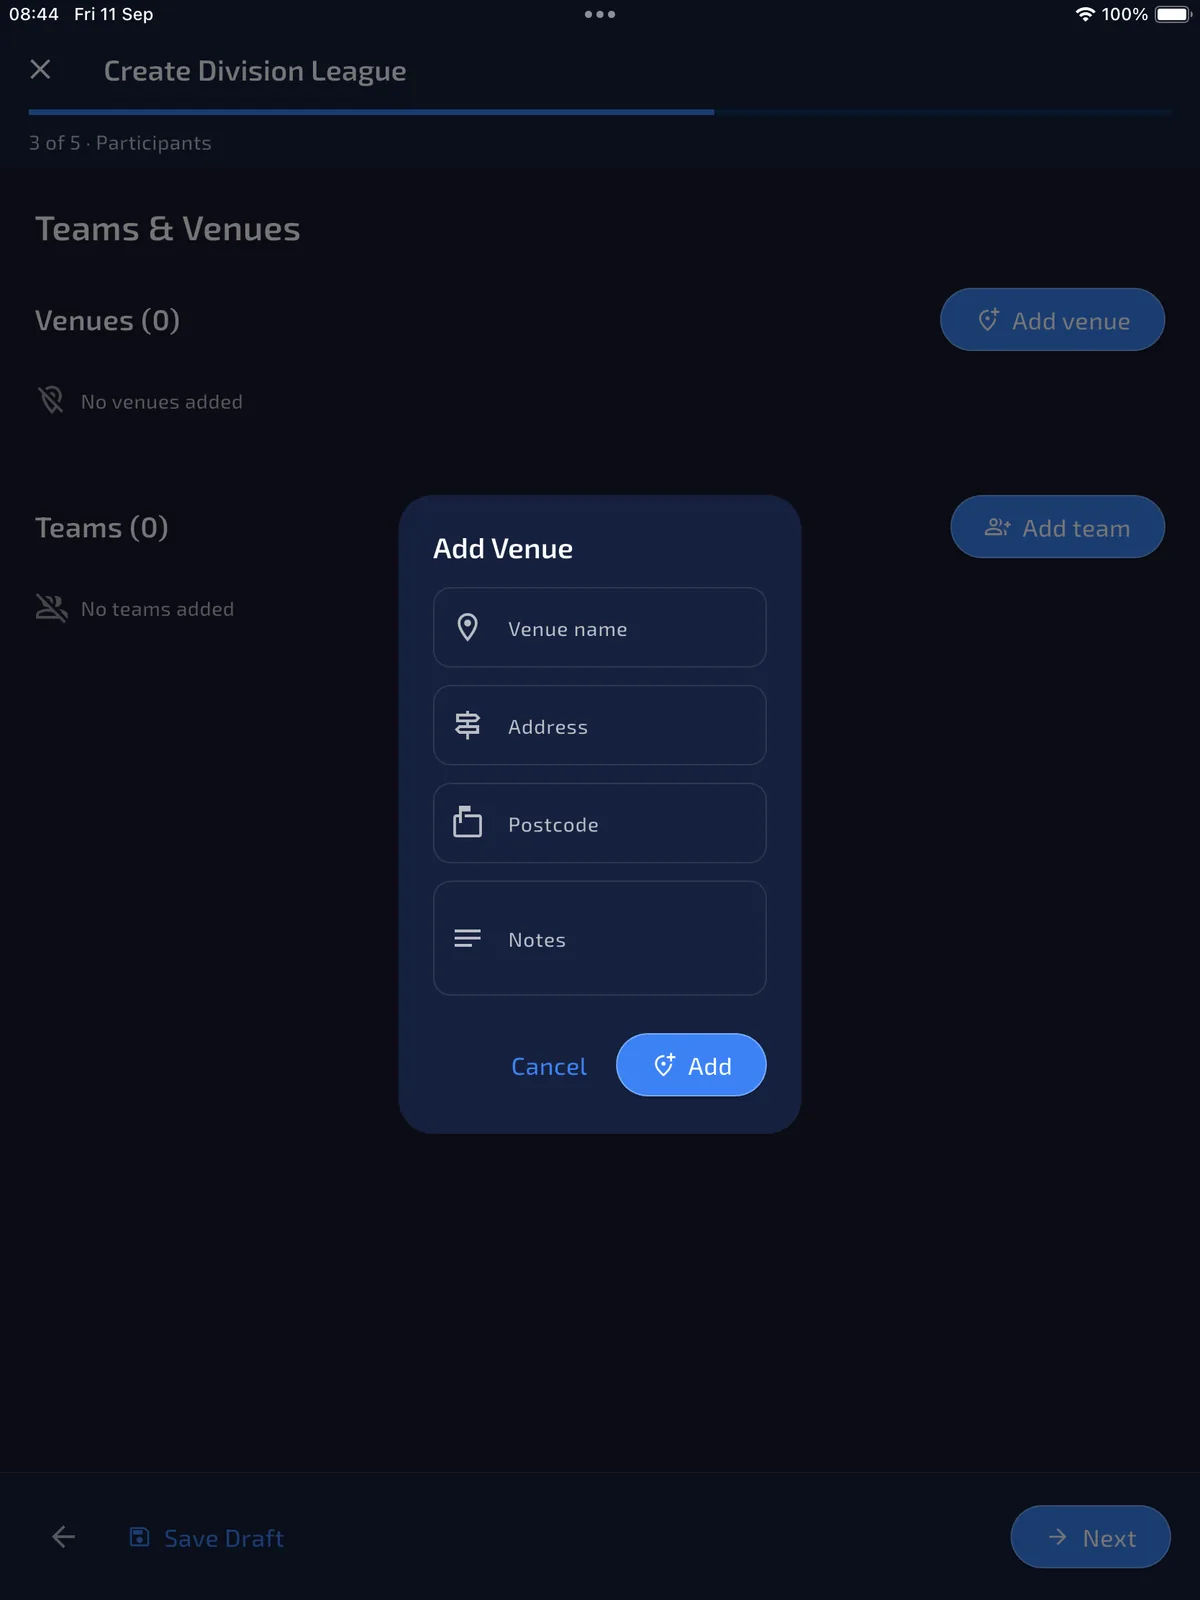
Add Venue asks for Venue name, Address, Postcode and optional Notes. Names and addresses use title case; postcodes stay uppercase. The first venue becomes the league default unless you choose another later with Set default venue.
09 · Step 4 of 5 · Match rules
Set the common match format
ResultEvery division inherits a complete match format that can be overridden later.
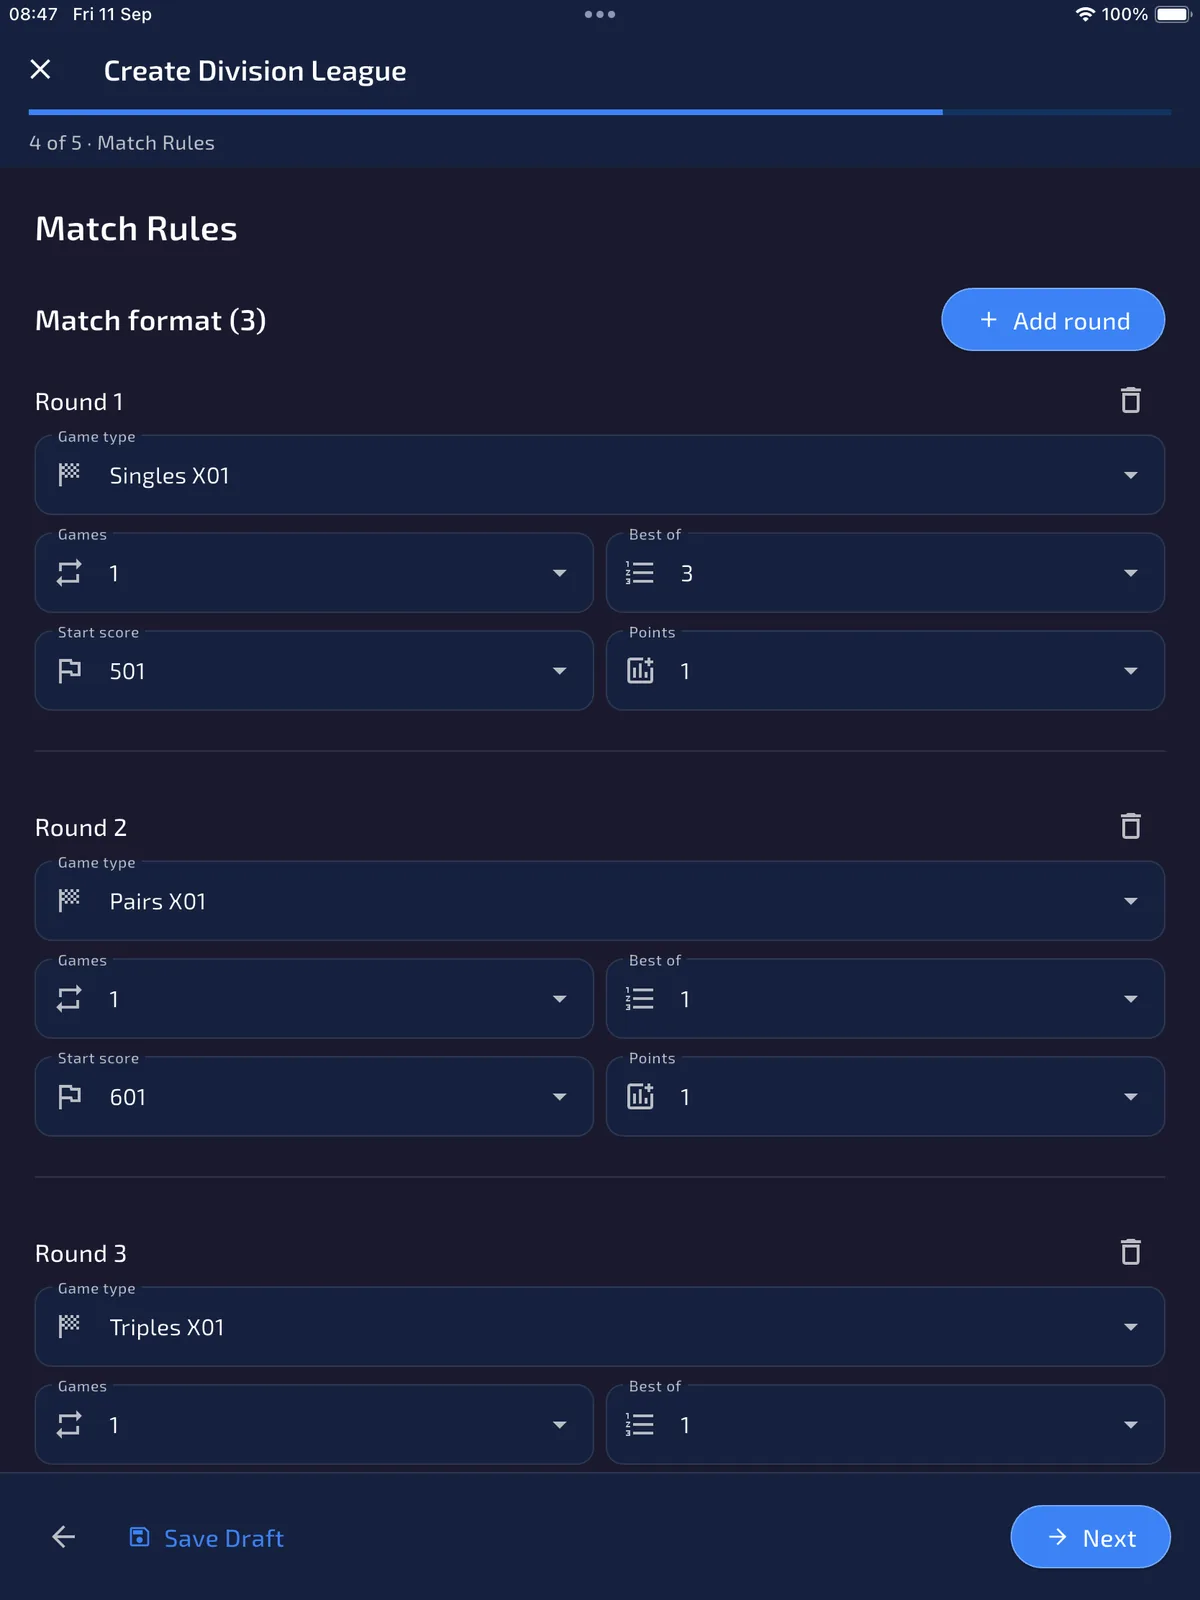
Step 4 of 5 is Match Rules. The Match format list is the common round list inherited by every division until an admin later adds a custom override. Each round has a game type, games count, best-of legs, start score and points.
This example keeps three rounds: Singles X01 501 best of 3, Pairs X01 601, and Triples X01 701. Use Add round for up to eight rounds. Player division leagues are limited to Singles X01 rounds.
- Check each round’s game type, start score, games, points and Best of 1, 3, 5, 7 or 9.
- Set Times each team plays (1–4). This becomes the round-robin repeat inside every division.
- Choose Starter selection: First leg or Each leg.
After creation, League Details → Manage → Division Formats can leave a division on this common list or enable Custom format for that division only. Manage → Format updates untouched pending fixtures when the common list changes later.
10 · Step 4 of 5 · Match rules
Choose how the table awards points
ResultResults update the league table using the scoring method you intend.
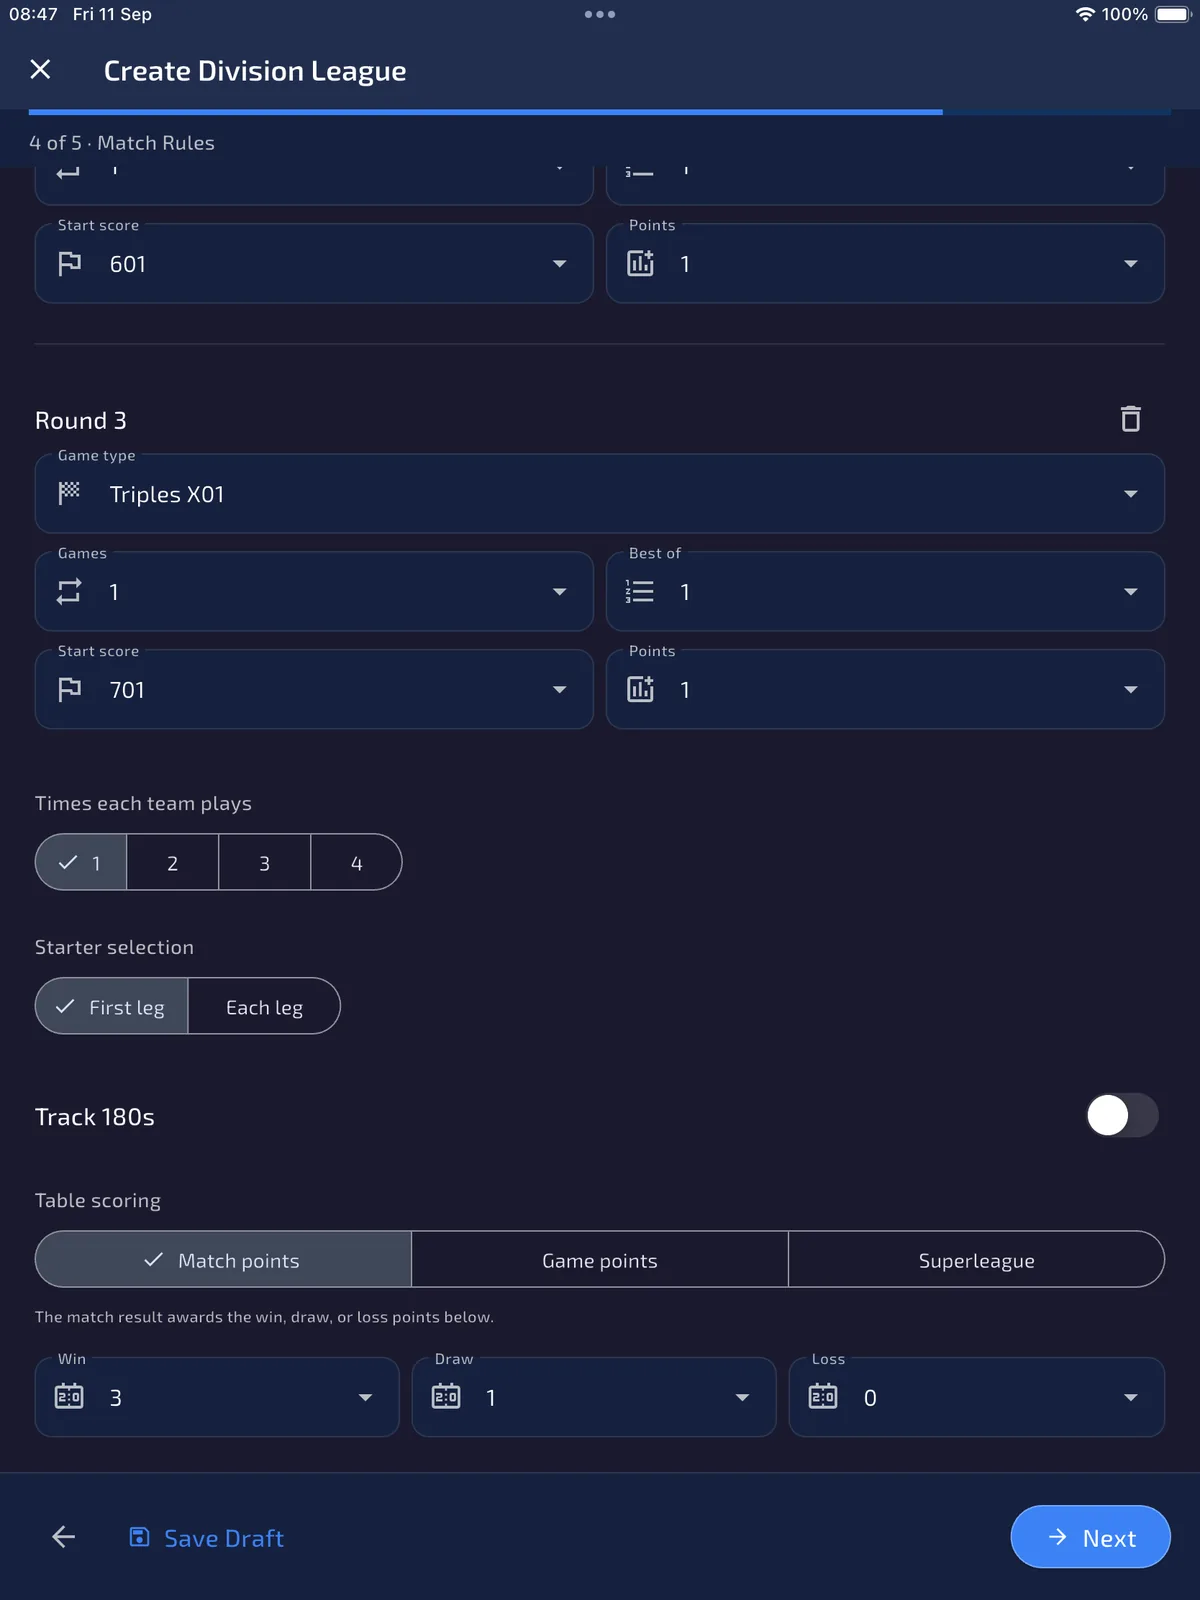
Table scoring is league-wide. Match points uses the Win / Draw / Loss awards underneath (defaults 3, 1 and 0). Game points writes each side’s final match score into the table, so 8–5 awards 8 and 5. Superleague is team-only: points are games-for plus one for a match win, and the table also tracks GA, LF, LA, 100s, 180s and cumulative one-dart team average.
Track 180s is a separate switch for Match points and Game points. Superleague always tracks 180s, so that switch is hidden.
11 · Step 4 of 5 · Match rules
Read the Superleague table contract
ResultYou understand which match details are required for the full Superleague table.
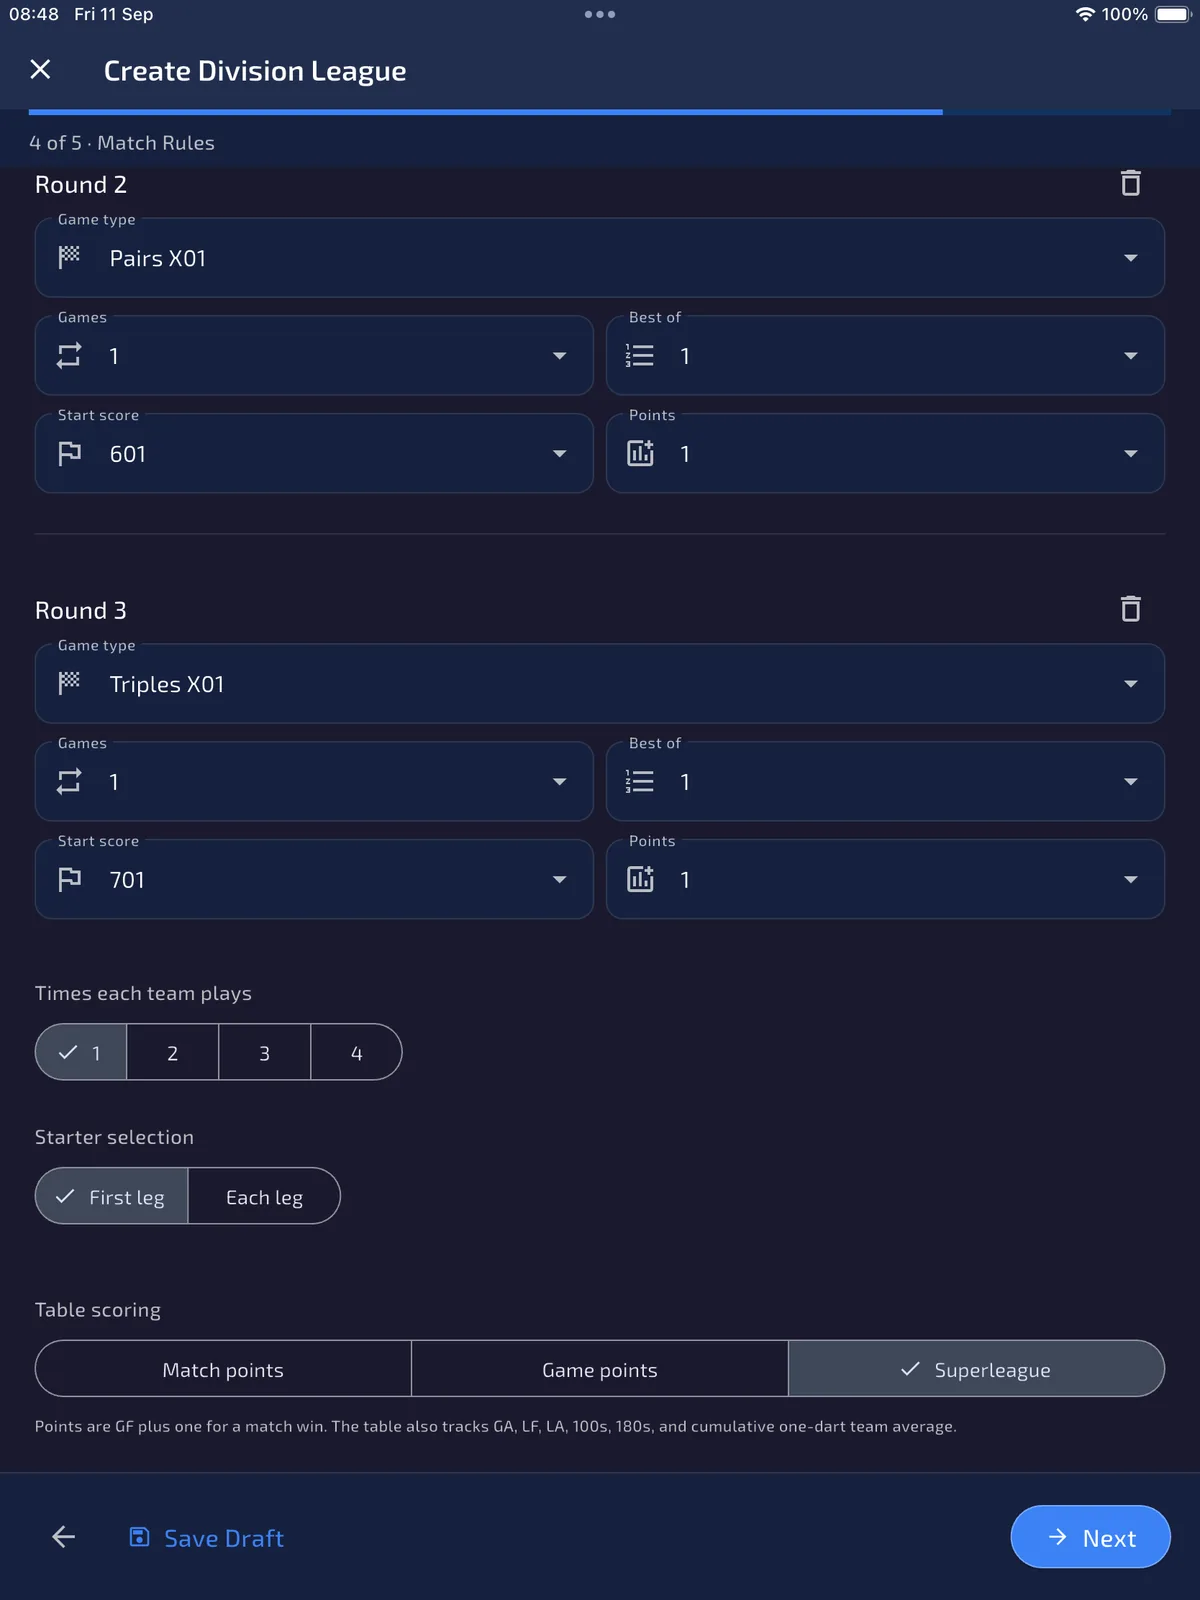
If you select Superleague, the help text changes to: points are GF plus one for a match win, and the table also tracks GA, LF, LA, 100s, 180s and cumulative one-dart team average. Ties then order by points, GF difference, leg difference, T/AVE, GF and team name.
A score-only result can update played/won/lost/drawn, GF/GA and points. It cannot invent LF/LA, 100s, 180s or T/AVE without detailed scoring data.
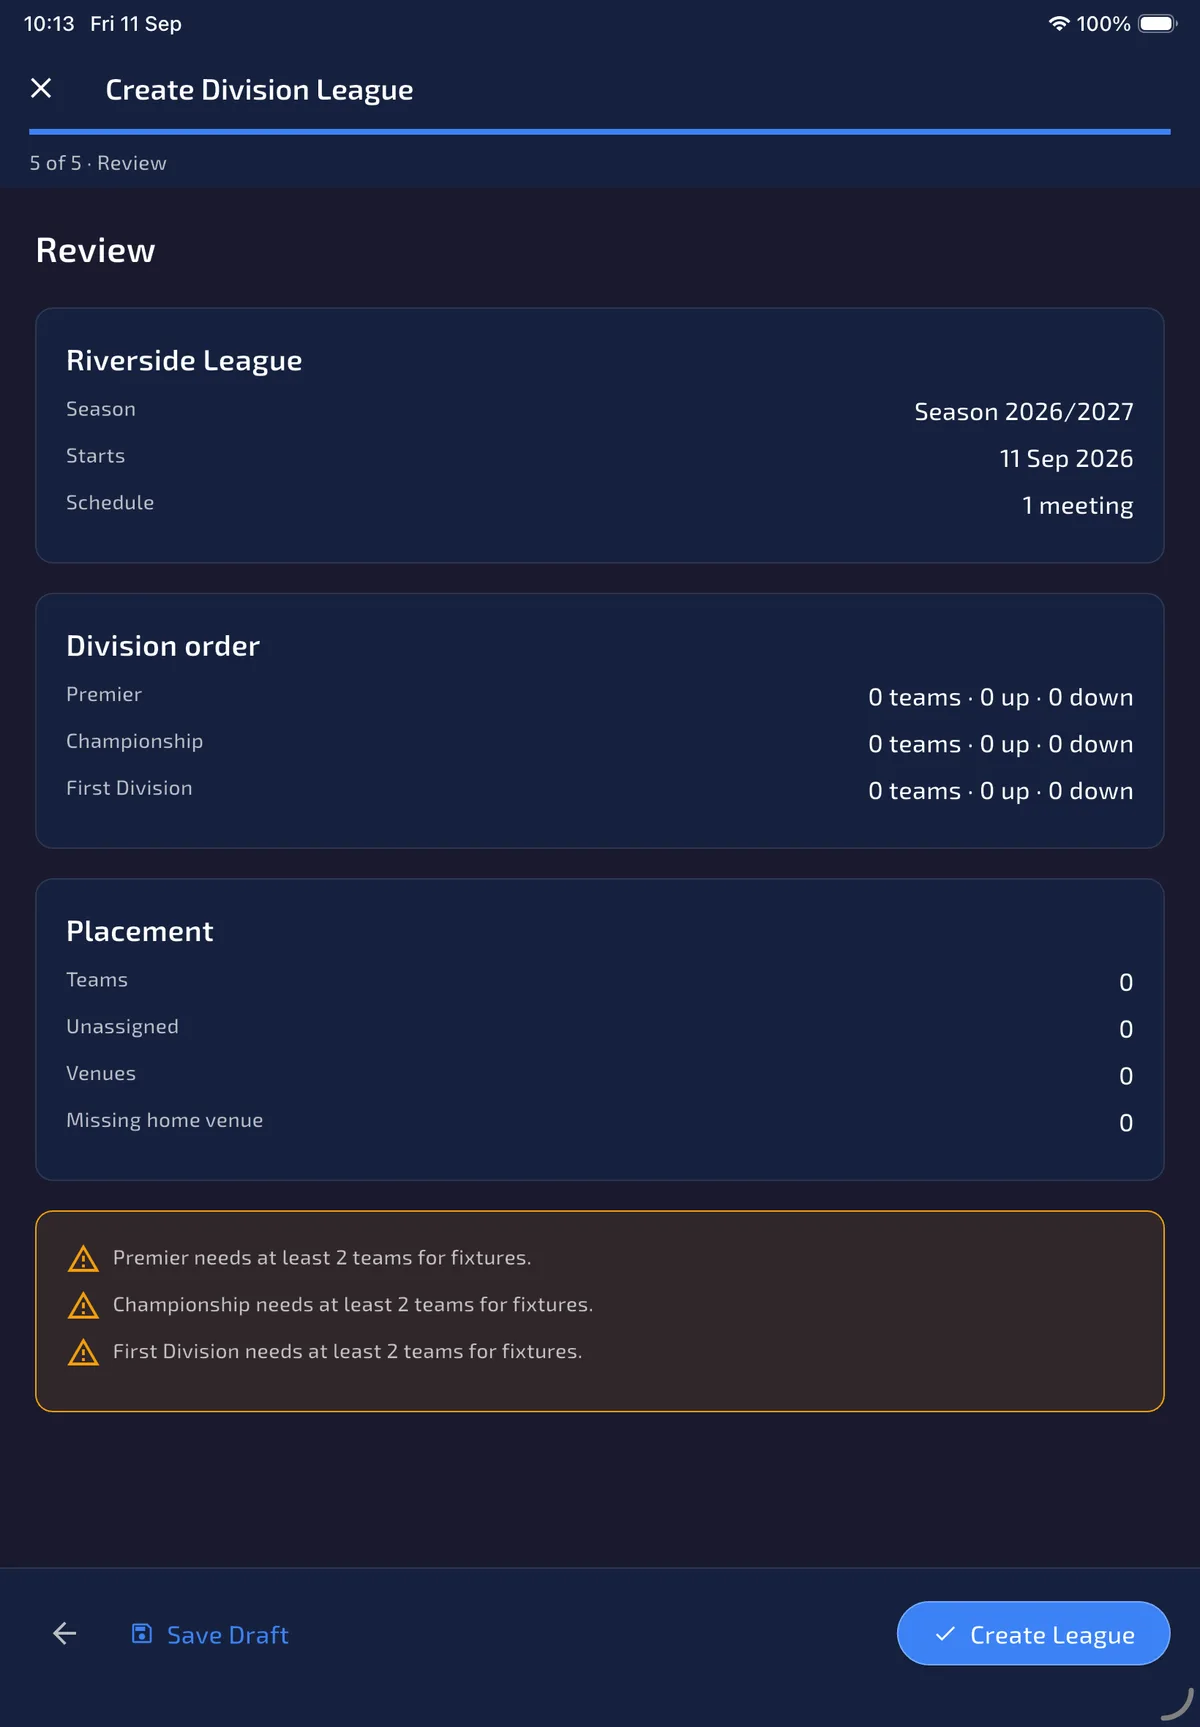
12 · Step 5 of 5 · Review
Review, save a draft, or create
ResultYou either preserve an unfinished setup or create a league ready for final checks.
Step 5 of 5 summarises the league, season, meeting count, division order with team counts and movement, and placement (teams, unassigned, venues, missing home venues). Create League stores the setup. Save Draft keeps work on this device.
The review also lists errors that block a complete setup. Each division needs at least two teams (or players). After creating a team league, check every roster and assign every team a captain before Generate Fixtures can build the division round robins. You can still save a draft and finish these requirements later.
- Check the division order line for each level: team count, up and down.
- Add missing teams or venues, then check rosters and captain assignments after creation.
- Tap Save Draft to continue later, or Create League when the structure is ready.
- After every team has a captain, open League Details → Fixtures and Generate Fixtures. Each division gets its own round robin; teams never play across divisions.
Before generating fixtures, open Teams/Players → team details, check each roster, and use Assign Captain or Assign Me so every team has a captain. Open a roster player and use the Claim Code QR action when they need to link their own account; the separate claim guide covers the player steps.
Use Manage → Division Formats if one division needs a different X01 round list, Manage → Promotion & Relegation to edit movement places, then Fixtures → Generate Fixtures to build a separate round robin inside each division. Score a team fixture covers Finish Match and upload. For setup problems, keep the app data and contact support with your build and the step that failed.